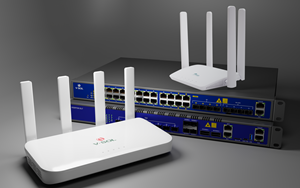


一、Windows 上的 EMS 安装
下面介绍Windows系统下安装EMS的步骤。

第一步:Windows Server 设置
打开“控制面板”,点击“用户账户”进入用户账户界面,选择“更改用户账户控制设置”,将通知改为“从不通知”。

第 2 步:安装服务器
1. 双击启动安装。

2. 设置安装路径,点击“Next”继续。
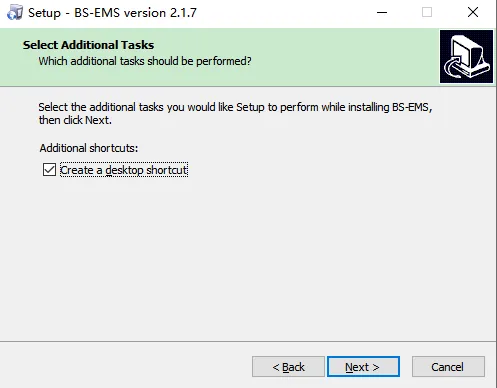
3. 选择“创建桌面快捷方式”,然后单击“下一步”继续。

4. 点击“安装”开始安装服务器。

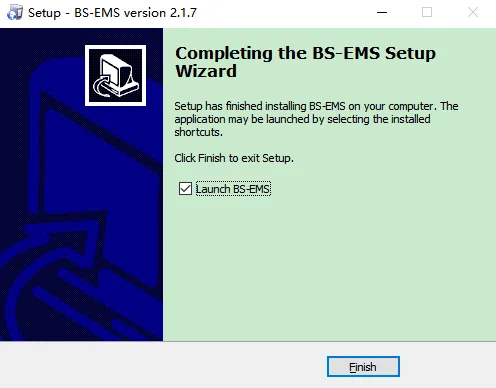
5. 1-2分钟安装完成,点击“Finish”完成安装。
第三步:启动服务器服务
1. 双击图标启动EMS服务器。
2. 以管理员身份操作,点击“启动”启动服务器。

3、启动成功后,可以找到任务管理器的服务选项,成功启动tomcat服务和vsolmysql服务。

第四步:浏览器访问服务器
-服务器本地访问
地址: http ://127.0.0.1:8081/emsWebServer/ 或 https://127.0.0.1/emsWebServer/
用户名/密码:root/root
-客户端访问
地址: http://xxxx:8081/emsWebServer/ 或 https://xxxx/emsWebServer/
用户名/密码:root/root
xxxx为服务器IP或域名

二、Linux 上的 EMS 安装
下面将介绍在Linux 系统下安装EMS 的步骤。
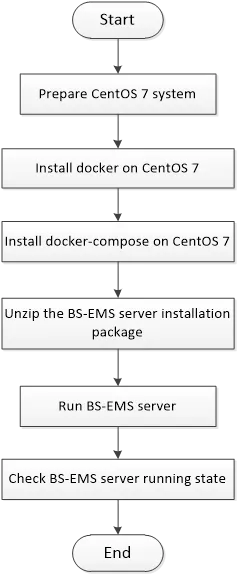
第一步:准备Linux系统
安装前需要准备一个支持docker和docker-compose的Linux系统。本手册使用 CentOS 7。
笔记:
本文中的命令由 root 用户执行。如果他们不是 root,则所有命令都必须以 sudo 开头。

第二步:在 CentOS 7 上安装 Docker
一、安装docker所有步骤合集
[root@localhost ~]# yum -y update
[root@localhost ~]# yum install -y yum-utils device-mapper-persistent-data lvm2
[root@localhost ~]# yum-config-manager –add-repo
https://download.docker.com/linux/centos/docker-ce.repo
[root@localhost ~]# yum list docker-ce –showduplicates | sort -r
[root@localhost ~]# sudo yum install -y docker-ce
[root@localhost ~]# systemctl start docker
[root@localhost ~]# systemctl enable docker
[root@localhost ~]# docker version
2. 安装docker的步骤分析
● 更新yum。
yum -y update
● 如果之前安装过旧版本的docker,请将其卸载。
yum remove docker docker-common docker-selinux docker-engine
● 安装需要的软件包,yum-util 提供了yum-config-manager 功能,另外两个是device-mapper 的驱动依赖。
yum install -y yum-utils device-mapper-persistent-data lvm2
● 设置yum 源
yum-config-manager –add-repo http://download.docker.com/linux/centos/docker-ce.repo
● 选择docker版本并安装
① 查看有哪些版本
yum list docker-ce –showduplicates | sort -r
② 安装docker
sudo yum install -y docker-ce
显示这个表示安装成功:

● 启动Docker并设置自动开机
systemctl start docker
systemctl enable docker
● 检查安装的 docker 版本
docker version

第三步:在 CentOS 7 上安装 Docker-compose
1. 运行此命令下载 Docker Compose 的当前稳定版本:
sudo curl -L “https://github.com/docker/compose/releases/download/1.28.4/docker-compose-$(uname -s)-$(uname -m)” -o /usr/local/bin/docker-compos
2. 对二进制文件应用可执行权限:
sudo chmod +x /usr/local/bin/docker-compose
第四步:解压BS-EMS服务器安装文件
1. 将BS EMS服务器文件放在Linux home路径下。

2. 解压BS EMS安装文件
[root@localhost ~]# tar -zxvf bsems.tgz -C./

第 5 步:运行 BS-EMS 服务器
进入安装包解压后的目录,执行startup.sh脚本。
[root@localhost ~]# cd bsems
[root@localhost bsems]# ./startup.sh

第六步:查看BS-EMS服务器运行状态
[root@localhost ~]# docker ps -a